6/28/2015

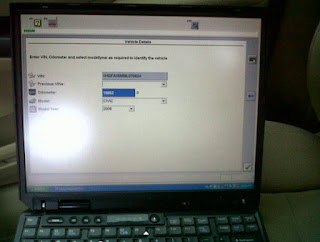
How to Reset Toyota RA66 Airbag by Original Digimaster iii?

Digimaster iii is original YANHUA brand product,it supports online updating,can do varity of car models. It works with various types of adapter you can easily achieve odometer correction, Audio decoding, airbag resetting, engine ECU resetting, IMMO, programming key for Benz &BMW etc.
digimaster 3
Here is the detailed steps on how to do airbag resetting for toyota car by digimaster iii
1.Enter the airbag resetting interface,choose the relevant model.Here we take Toyota as example.
original digimater iii
2.The airbag will be showed in the list by number.Take “toyota09170-06340″ as example,you can find out the chip in airbag ECU according to the diagram,then dismantle the chip to install to OBP adapter,click “next step” to go.
digimaster iii
3.After finish reading data,it will prompt you whether need to restore airbag.Click “next step”,the data will be restored to airbag chip.
digimaster iii

6/24/2015

What is The difference between BA100 and BA101 Battery Tester

QUICKLYNKS BA101 Automotive 12V Vehicle Battery Tester is designed to test the condition of the automotive battery using conductance method. Unlike the conventional method of draining the battery by applying resistance load to it and obtain the result from the meter gauge; this analyzer utilizes a series of pulsed voltage across the battery cells and observes the AC current that flows in response to it.

What is The difference between BA100 and BA101 Battery Tester

Increasing function For BA101

1. BA101 increases cranking system test and charging system test.
2. BA101 increases EFB battery
3. BA101 increases quick test function
4. BA101 increases auto-storage functionBA101
5. BA101 increases Print function via computer.
BA101

II, The advantage for BA101

1. Four button for operation, more convenient for client.
2. Bigger display, more information. as below picture


3.BA101 can shows the testing result in one screen, but BA100 only show one or two items in one screen.
ba101 battery tester

so that BA100 must need five displays to show all information

6/22/2015

How to Memorize Honda 08 TPMS sensor ID with Honda HIM HDS

Newest V3.015.020 Honda HDS HIM diagnostic tool is affordable and powerful diagnostic tool for Honda vechiels from 1992-2014.11 year.When you replace the TPMS control unit, replace the tire pressure sensor, or substitute a good wheel with tire pressure sensor, you need to get the all 4 tire pressure sensor IDs memorized.Honda HDS HIM is a good choice for it.

How to Memorize Honda 08 TPMS sensor ID with Honda HIM HDS
NOTE:
Let the vehicle sit for at least 5 munities to allow the tire pressure sensors to switch to sleep mode.
The vehicle with the new tire sensor must be at least 10 ft (3m) away from other vehicles that have sensors.
Connect the Honda diagnostic system with vehicle via OBD port on the driver’s side under the dashboard
Turn ignition ON
Make sure HDS Honda is well communicate with TPMS control module

Enter vehicle information in HDS program


Select "Honda Systems" from Mode selection menu

Select "TPMS" control module

Select "Sensor ID Learning" from the Mode menu

The Honda HDS software will display Tire pressure sensor ID, follow the screen prompt to turn on the TPMS Trigger Tool.


Hold the TPMS tool (A) near the valve stem of one wheel, and memorize the tire pressure sensor ID by following the screen prompts on the HDS.
If you turn the ignition OFF before memorizing all four sensor IDs, the memorizing sensor ID will be canceled.
Write down the 4 tire pressure sensor IDs.
Exit the Honda HDS software and disconnect Honda HIM tool.

6/17/2015

Difference about Original Autel MaxiDiag Elite Scanner

1.Autel Maxidiag scanner Features:
1.Reads and clears trouble codes on engine, transmission , airbag, and ABS failures
2.Supports all 10 test modes of the latest J1979 OBD II test specs.
3.Enhanced OBD II Mode 6
4.OBD II code tips guide technicians to the root cause of trouble codes faster
5.Data graphing
6.View freeze frame data
7.USB cable included for product updates
8.Prints data via PC-link

MaxiDiag Elite Scanner Comparison
Item No.
MD704 
HKSC132
MD702
HKSC130
MD701
HKSC129
MD701
HKSC125
MD703
HKSC127
MD704
HKSC128
MD702
HKSC126
MD802
TKSC124-D
MD802 
HKSC124-B
Language
Multi-languages
(German/
French/
Spanish/
Dutch/Polish/
Portuguese/
Italian)
Same Multi-LanguageSame Multi-LanguageEnglish OnlySame Multi-LanguageSame Multi-LanguageSame Multi-LanguageEnglish OnlyEnglish Only
Support System
4 System
(PCM/RCM/
TCM/VDM)
4 System
(PCM/RCM/
TCM/VDM)
4 System
(PCM/RCM/
TCM/VDM)
For All SystemFor All SystemFor All SystemFor All SystemFor All System+DS ModelFor 4 Systems +DS model
Support Vehicles
Global OBD I & OBD II coverage
(US, Asian, & European)
European Vehicles
Asia Vehicles
(Especailly for Japan Cars) 
Asia VehiclesUSA(GM, Ford, and Chrysler) VehclesEuropen Vehciles
(Peugeot, Citroen,
Renault, Dacia, Fiat, Alfa-Romeo, Abarth)
Europen VehiclesInclude MD701, MD702, MD703, MD704 vehiclesEuropean, Asian, and Domestic vehicles
Support ProtocolOBD II/OBD IOBD IIOBD IIOBD IIOBD IIOBD IIOBD IIOBD IIOBD II
Features of Maxidiag
1.With the optional OBD-I adapter set, the MaxiDiag can diagnose older vehicles.
2.Reads and clears trouble codes on engine, transmission , airbag, and ABS failures
3.Supports all 10 test modes of the latest J1979 OBD II test specs, including Read Codes,Erase codes, Live Data, Freeze Frame, I/M Readiness, O2 Monitor Test, On-Board Monitor Test, Component Test, and  Vehicle Information
4.Enhanced OBD II Mode 6
5.OBD II code tips guide technicians to the root cause of trouble codes faster
6.Data graphing
7.View freeze frame data
8.USB cable included for product updates
9.Prints data via PC-link

6/09/2015

What is the difference of 4 Multidiag Actia Access J2534?

Multi-Diag Access J2534 Pass-Thru OBD2 Device is universal diagnostic tool,it is mainly for European car models.And newest status is 2014.01 version.


You may be interested in Multi di@g Access J2534 Comparison table, since there are 4 kinds of version available.
Item NoSP04SP04-DSP04-GSP04-C
ProductI-2014 Multi-Diag Access J2534I-2013 Multi-Di@g Access J2534 II-2013 Multidiag Access J2534V2011 Multi-Diag Access J2534
softwareV2014.01V2013.01V2013.02V2011
VCI-076957076957093479
Vehicle coverage23 Brands, Update
5300 for new
systems
26 car brands Models – 3541 new
system
19 car brands
Models – 190 new system
The least model
coverage
Operating systemWin XP and Win7 32BitWin XP and Win7 32BitWin XP and Win7 32BitWin XP
functionMaintenance, Air Conditioning, pollution control, ground connection, post-equipment, braking and expert mode
languageEnglish, Spanish, German, French, Italian, Portuguese, Bulgarian,
Croatian, Czech, Danish, Dutch, Finnish, Hebrew, Hungarian, Polish, Romanian, Russian, Serbian, Slovenian, Swedish, Turkish
NOTE1) The main difference between different versions is on the cover of the vehicle. More software version, most vehicles it covers.
2) V2014.01 V2014.02 and will automatically enter the VCI number, but other versions must enter the VCI number manually.

6/07/2015

Free Download Scania VCI 2 SDP3 V2.21 Software

Scania VCI2 is a tool that is used together with Scania Diagnosis and Programmer 3 (SDP3) software to diagnose and troubleshoot Scania heavy vehicles and trucks.Now,buyobdtoolshop.com released newest v2.21 software.
http://www.buyobdtool.com/upload/pro/59/scania-vci2-truck-diagnostic-tool-1.jpg
1.What you need to pay attention for Scania VCI 2?
1. If You Want to Update Software, Please Buy New Software with Dongle.
2. After install V2.20 software, no need to connect with dongle any more. This V2.20 setup only for win7 32 bit.rar, cannot  be used on windows 7 64 bit or XP system
3. If you only use windows XP system, you can still use V2.17 software with dongle, there is both V2.17 and V2.20 software inside the pacakge for you to choose according to your computer system
4. If only buy the newest V2.20 sofware, price is 30USD with free shipping cost by simple mail
5. If you used the V2.20 software and think it is not good enough, we suggest you use back to V2.17 software


2.Free Download Scania VCI 2 SDP3 V2.21 Software
Here is the link to free download Scania VCI 2 SDP3 V2.21 software:http://www.chinaautodiag.com/html/scania-vci-2-truck-diagnostic-tool-software-free-download-3476.html
Please download the v2.21 four parts.

scania-vci-2-software-download

6/03/2015

How to install Autel MaxiFlash Pro J2534 ECU Programming Tool?

Autel MaxiFlash Pro J2534 ECU Programming Device,it is reliable, fast performance, and flexibleUsing the OEM software, this premier tool is capable of providing dealer-level programming capabilities for all makes, all models at an affordable price. Support Toyota, Volvo, Honda, Jaguar and BMW.

Install Device Driver
In order to make the MaxiFlash Pro operate correctly with the re-flashing and diagnostic applications in the target PC, you will first install the MaxiFlash Pro J2534 Pass-thru device driver onto PC that will control the device.

1)Insert the software driver CD to your computer. The driver installation wizard will load automatically.
2)Click on Next to welcome to the program main page
3)Select Next on the installation location and installation name. It is recommended not to change the default settings. Otherwise the computer may have a hard time recognizing the driver
4)Click Install and the driver program will be installed on your PC

Note: During this time, a MS-DOS style window will pop out and may remain on your screen for a short while. It is normal, do not attempt close the MS-DOS style program as it will prevent the driver from being installed completely. It will be closed automatically when the driver is successfully installed.

Install MaxiFlash Pro software
5)Connect the MaxiFlash Pro programming tool with PC using USB cable. A “Found New Hardware Wizard” window will display
6)Select [Install the software automatically (Recommended)], click on Next and windows will search for the driver software automatically.
7)Select ]MaxiFlash Pro] program and click on Install.
8)When the MaxiFlash pro device driver is successfully installed, you will be able to see the [MaxiFlash Pro] entry in the Device Manager under [Maixi Pass Thru Serial]


NOTE:
If the driver installation is not complete or unsuccessful, or the PC still can’t recognize the device, an Error or Question mark will display beside the entry icon. Please try installing the driver program again by clicking the entry, then select start auto searching for the software, or manually locate the specific file that contains the driver program.
9)      Ethernet Connection. Using wired network between the Pass-Thru device and the PC, users can choose either way of connection described as below:
Connecting to a PC Directly

  1. Connect the PC to the Pass-Thru device with the supplied Ethernet cable.
  2. Open “My Network Places” Properties.
  3. In the Properties window, under the LAN or High-Speed Internet heading, right click on the “Local Area Connection” and select “Properties”.
  4. Now a new window should pop up, titled “Local Area Connection Properties”. Here you need to select the Internet Protocol (TCP/IP) option, and then click on the “Properties” button
Again a new window titled “Internet Protocol (TCP/IP) Properties” will pop up. In this window, you need to select “Use the following IP Address” radio button, and set the specific IP address (take the value shown in picture below example), then click on “OK”.
NOTE: For specific IP address information please contact your network administrator.
After all the above properties settings have been properly set, users can continue on completing the network configuring procedure, please refer to the detailed operation guidance in
MaxiFlash Configuration – Wired Network.
Connecting to an Existing LAN
1. Connect the Pass-Thru device to a local network with the supplied Ethernet Cable.
2. On most LANs, Autel MaxiFlash Pro can obtain its IP address automatically using DHCP.
MaxiFlash Configuration – Wired Network
1) Connect the Pass-Thru device to the PC or an existing LAN with the supplied Ethernet cable.
2) Power up the device by the external power supply; verify the green Power status light on the front panel is on.
3) Verify the Ethernet status light is on.
4) Click on “All Programs” from Windows Start Menu, find the “MaxiFlash Pro” entry under “Autel”, click on “MaxiFlashCFG”, and wait for the program interface to pop up.
5) Select the “Settings” tab to set up the network configuration.
6) Select “DHCP”, if you are connecting to the local area network, the MaxiFlash Pro will obtain the IP address automatically. Select “Manual”, if you are connecting to the PC directly for the first time, and then set the IP address on your own.
7) Click on the “Apply” button to save the network configuration